

-
Introduction
Introduction to Animation4 Topics1 Quiz -
UI Elements: First StepsSetting up our example: a simple toolbar.3 Topics
-
Using the Unity Interface3 Topics
-
Creating a Clear Shot Camera2 Topics
A newly created element is ignored until it is added to the rootVisualElement. Each EditorWindow comes with a rootVisualElement for all of the UI in it.
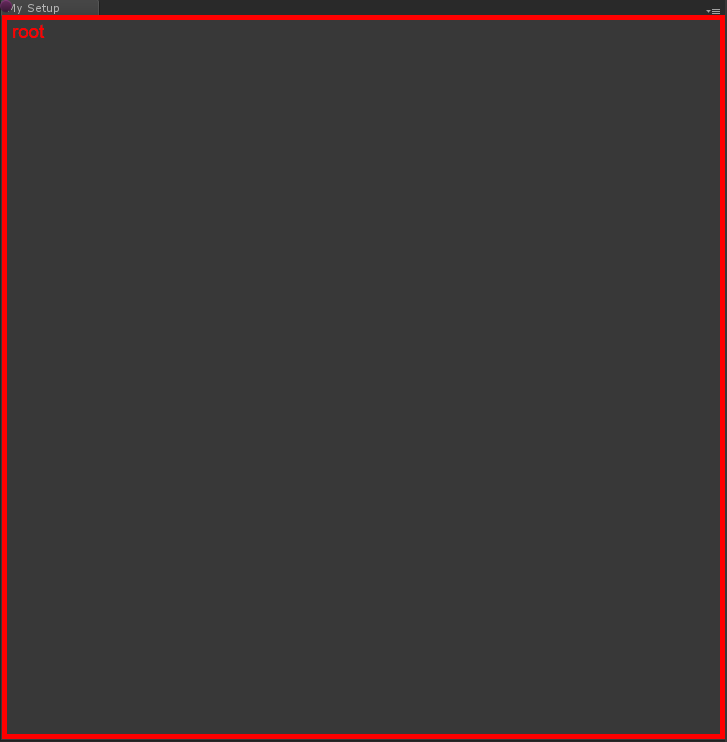
First of all, you need to get the rootVisualElement of the window. You can get it in the OnEnable() method:
private void OnEnable()
{
    // Reference to the root of the window.
    var root = rootVisualElement;
}
You can now start adding new elements into it.
Creating an element directly in C#
Before getting into UXML, let’s first see how to create a basic element in C#.
private void OnEnable()
{
    // Reference to the root of the window.
    var root = rootVisualElement;

    // Creates our button and sets its Text property.
    var myButton = new Button() { text = "My Button" };

    // Gives it some style.
    myButton.style.width = 160;
    myButton.style.height = 30;

    // Adds it to the root.
    root.Add(myButton);
}
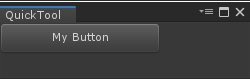
It’s that simple! If you save your code and go back to Unity, your window should contain a simple button:
You could keep adding elements directly from a C# script but as your UI/window becomes more complex, the recommended workflow is to separate the hierarchy of elements (using UXML) from their styling (using USS) and using a C# script to connect everything together and add behaviours, actions and bindings.Delete (or comment) what you’ve just done and let’s jump into UXML!
Creating UXML files
A UXML file is basically the structure, the hierarchy of all the elements you are going to create.On your desktop, create two text files and name them respectively “QuickTool_Main” and “ButtonTemplate”. Change both files extension to “.uxml”. Then, inside both of them, copy/paste the following:
<UXML xmlns="UnityEngine.UIElements">

</UXML>
Finally, drag & drop both files into your Project folder in Unity. Place them inside Assets > Editor > Resources.A very efficient way to build your layout would be to create a template inside an UXML file and instantiate it through another one. The “ButtonTemplate” file will be exactly what it says: a template of a button with a VisualElement nested in it that will serve as its icon. The “QuickTool_Main” file will be the hierarchy that will be added to the root. It will instantiate the template as many times as you need it to and serve as the hierarchy for the VisualElements.Let’s create a button template. Open the “ButtonTemplate” UXML file:
<UXML xmlns="UnityEngine.UIElements">
  <!-- Creates the button. -->
  <Button class="quicktool-button">
    <!-- Adds a VisualElement child (corresponding to the button's icon). -->
    <VisualElement class="quicktool-button-icon"/>
  </Button>
</UXML>
Now, you need another UXML file which will instantiate this button template multiple times.Let’s create the hierarchy. Open the “QuickTool_Main” UXML file:
<UXML xmlns="UnityEngine.UIElements">
  <!-- Creates our template and gives it a name for future reference. -->
  <Template path="Assets/Editor/Resources/ButtonTemplate.uxml" name="button-template" />
  <!-- Creates a parent VisualElement in which we will add our template. -->
  <VisualElement class="buttons-container">
    <!-- Instantiates the template multiple times. Each time, we give it a name and a class for future reference. -->
    <Instance template="button-template" name="Cube"/>
    <Instance template="button-template" name="Sphere"/>
    <Instance template="button-template" name="Capsule"/>
    <Instance template="button-template" name="Cylinder"/>
    <Instance template="button-template" name="Plane"/>
  </VisualElement>
</UXML>
Connecting everything through a C# script
Now that your UXML files are done, you can start working on your C# script. First, load and clone the VisualTree and add it to the root. Then, set up your buttons and finally, add a callback to all the buttons:
private void OnEnable()
{
    // Reference to the root of the window.
    var root = rootVisualElement;

    // Loads and clones our VisualTree (eg. our UXML structure) inside the root.
    var quickToolVisualTree = Resources.Load<VisualTreeAsset>("QuickTool_Main");
    quickToolVisualTree.CloneTree(root);

    // Queries all the buttons (via type) in our root and passes them
    // in the SetupButton method.
    var toolButtons = root.Query<Button>();
    toolButtons.ForEach(SetupButton);
}
Let’s now write the SetupButton() method:
private void SetupButton(Button button)
{
    // Reference to the VisualElement inside the button that serves
    // as the button’s icon.
    var buttonIcon = button.Q(className: "quicktool-button-icon");

    // Icon’s path in our project.
    var iconPath = "Icons/" + button.parent.name + "-icon";

    // Loads the actual asset from the above path.
    var iconAsset = Resources.Load<Texture2D>(iconPath);

    // Applies the above asset as a background image for the icon.
    buttonIcon.style.backgroundImage = iconAsset;

    // Instantiates our primitive object on a left click.
    button.clickable.clicked += () => CreateObject(button.parent.name);

    // Sets a basic tooltip to the button itself.
    button.tooltip = button.parent.name;
}
Note: For more information about UQuery, click here.Finally, let’s write the actual callback (CreateObject). It’s a simple method that instantiates a primitive according to the button’s parent’s name.
private void CreateObject(string primitiveTypeName)
{
    var pt = (PrimitiveType) Enum.Parse
                 (typeof(PrimitiveType), primitiveTypeName, true);
    var go = ObjectFactory.CreatePrimitive(pt);
    go.transform.position = Vector3.zero;
}
Save everything and go back to Unity. If you open your window, it should display the buttons, but they should all be “crushed”: they have no text as you use icons for the buttons.